
Outward Clearing at Head Office in DOP Finacle
Outward Clearing at Head Office in DOP Finacle
What is Clearing?
- When a customer presents the Non DOP cheque(Bank Cheque) at the counter then we have to send the cheque to clearing hose .
- A clearing house is from where all the Bank cheques will be received from the post office,then they will sort the cheques bank wise and the same will be sent to the respective banks for clearance.
- After clearance from the banks then the clearing house will intimate the same consolidating all the bank cheques along with the date of clearance to the respective post offices i..e., what we will call as Credit certificate in DOP terminology.
- Clearing in general will be of two types they are
- Inward Clearing.
- Outward Clearing.
1.Inward Clearing:-
- When the customers presents the DOP cheques in banks then those cheques will be sent from the clearing house to the respective post offices for clearance this is known as Inward Clearing.
2.Outward Clearing:-
- When the customers presents the NON DOP cheques i.e., bank cheques at the counter then we have to prepare a list of outward cheques and send them to the clearing house for clearing this is known as Outward Clearing.
Process of Outward Clearing in DOP Finacle:-
- Along with HO cheques we have to send the SO(Sub office) cheques under that particular HO.
Handling of SO(Sub office) cheques at HO
- Handling of SO(Sub office) cheques involves 2 steps i.e.,
- Generation of text file for the instruments lodged by SOs based on the SET ID and downloading it to PC(System).
- Uploading of SOs cheques
Procedure for Genearation of text file for instruments lodged by SOs
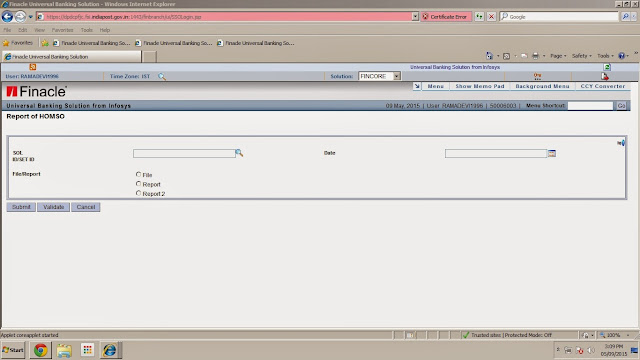
- Invoke the menu HOMSO then the system will display the screen as shown in the below

Then select the funciton code as "Verify" and enter the date as current date as shown in the figure

Then clcik on Go then the system will display the list of cheques entered by the counter PA then click on Submit.Then the sysetm will display the message Data Verified Successfully.
Generation of Report at Sub Offices
- Invoke the menu HOMSOEX in counter PA login then the system will display the screen as shown in the below
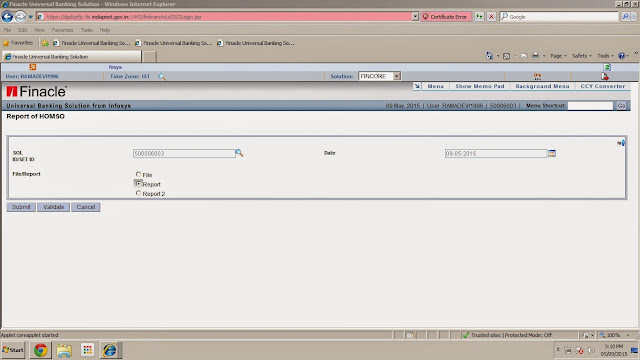
Then enter the following
Enter the SOLID ________(For the SO you are trying to geenerate)
date of lodging _____________
select the File/Report type as "Rport" as shown in the below figure
Enter the SOLID ________(For the SO you are trying to geenerate)
date of lodging _____________
select the File/Report type as "Rport" as shown in the below figure
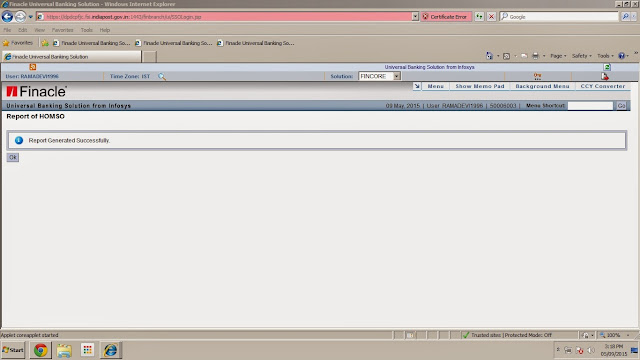
Then clcik on Submit then the system will display the message "File Generated successfully" as shown
Viewing the Report
- Invoke the menu HPR(Print Report) then the system will shown the sreen as shown

Then click on GO then the system will display the list of reports geenrated in the background from the list of reports select the report CHQLODGED.RPT as shown in the figure

Then click on View details as marked in the below screen click on the explode button as shown

Then the system will display the following screen as shown in the below figure
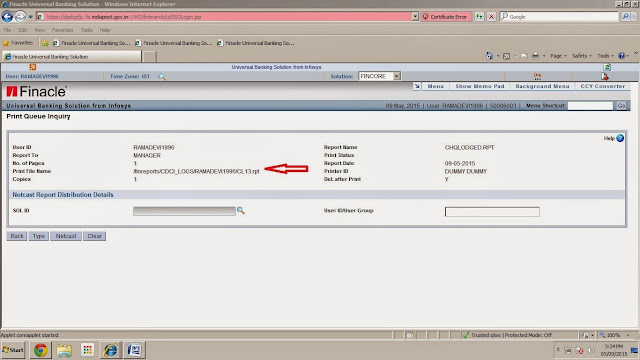
Send the file path as marked in the above screen so that we can genearate the txt file by below procedure
- Invoke the menu HTRFTOPC for text file generation then the system will display the screen as shown in the below figure

Then the system will ask two parameteres i.e., souce file and destionation directory
Enter the souce file as " /finreports/CDCI_LOGS/RAMADEVI1996/CL13.rpt " (in our example)
Enter the destination directory _________________ (Ex;-D:/ or C:/) as shown in the below figure

In our example we gave destination directory as 'D' drive then the text file will created in that 'D' drive by file name CL13.rpt (For example)
Uploading of cheques/instruments of SOs
- As in the previous step we have downloaded the SOs cheques to our PC(computer system) as mentioned in the previous steps.
- Now we have to upload the same instruments using the menu HCLUPLD and upload the SOs data.
- Invoke the menu HCLUPLD then the system will show the screen as shown

Then enter the following details as shown
Enter the Report To column as "Supervisor"
Enter the zone date ________________
Enter the zone code as "MICROW"
Select the FIle location path as "Local file path" as shown in the below figure
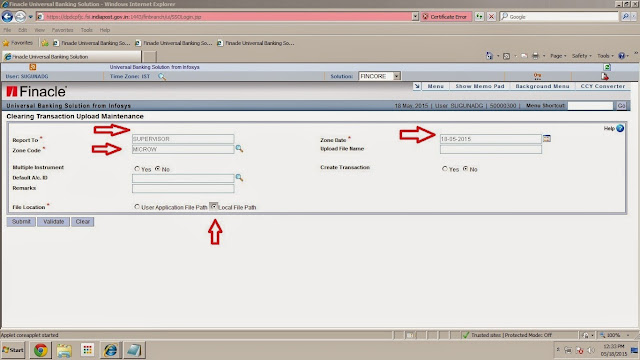
Then click on Submit then the system will shown the below screen

Then the system will ask the upload file path select the path where the file saved in the step HTRFTOPC as shown in the below figure
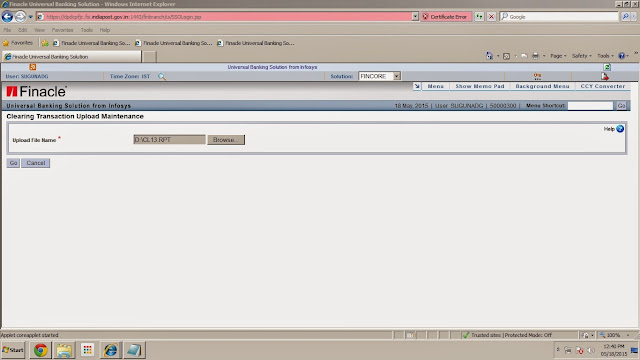
Then click on GO then the system will display the message "File uploaded successfully"
- Repeat the same procedure for all the SOs cheques i.e., generation of file,transfer to PC and then uploading the file.
- After completion of SOs cheques then we have to enter the HO cheques.
- Procedure to enter the HO cheques Click here.


A complete and latest guide about Finacle ver 10. It is basically written on DOP Finacle used in India Post. It explains all latest changes and solution of Finacle. Finacle solution consists all Finacle Menu and command and explains how to use them with relevant screen shoots.
0 Comments